CAPS- Chicago Area Photographic School is coming up November 23rd and 24th, 2019. To whet your appetite, we are going to occasionally do some blog posts by our speakers. Our first post is by one of our main speakers, Steve Perry.
"5 Tips That Will Instantly Improve Your Wildlife Photography"
When it comes to wildlife photography, there's an overwhelming
number of tips and tricks that promise to help you capture more compelling
imagery. However, in my experience as both a professional wildlife photographer
and a workshop instructor, I've discovered that following just five fundamental
techniques can ratchet your wildlife photography to the next level. These tips
are all incredibly simple - and perhaps even obvious - but the impact they have
on your images is often nothing short of profound.
Let's jump in.
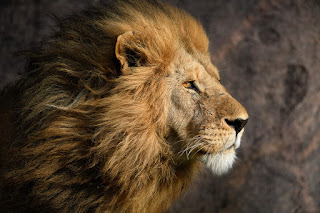
Tip #1 - Get To Eye Level
If I had a dime for every time I saw a photographer pointing their
lens down on some poor, unsuspecting animal, I'd finally be able to snag that
new 800 mm lens I've been drooling over!
The thing is, the best wildlife photos draw the viewer into the
animal's life - and shooting eye level gives you an express ticket to that
world. It creates a sense of intimacy and involvement that you usually can't
get when the lens is pointing downward.
Not only does it create a connection with your subject, but It
also offers a unique perspective. In my experience, the majority of
photographers tend to trade getting down to the animal's height in exchange for
a comfortable standing position. This means low, eye-level shots are the
exception rather than the rule.
Plus, shooting low can often "stack up" the foreground
and background, leading to a more isolated-looking subject.
So, don't be afraid to drop low when the opportunity is right -
you'll be surprised just how good things can get!
Tip # 2 - Watch Your Background
One phrase my workshop participants hear repeatedly is,
"Watch your background!"
A good, clean background that complements - and doesn't compete
with - my subject is as important to me as the animal itself. Often when a
photographer spots an animal, their instinct is to start shooting from the
exact spot where they first set eyes on it. On the other hand, the best
wildlife photographers note the animal's location and then maneuver around to
get the best possible background.
Clean, green backgrounds are always a crowd-pleaser, as are nice
tones of brown - or a combination of both. Avoid busy backgrounds and keep any
distractions to a minimum as well.
Also, avoid white "patches" of highlights in your images
since our eyes are attracted to the brightest area of the photo first. I avoid
white patches of sky, white trees/branches in the background, hot spots on
reflective leaves, and other highlights as much as possible. Keep the
background clean and your subject will pop!
Tip # 3 - Focus On The Eyes
When it comes to getting a sharp wildlife photo, you normally only
have one criteria - sharp eyes. If the eyes are sharp, the rest is usually just
fine. Also, when in doubt, focus on the eye closest to the camera.
When people first set their lens on wildlife subjects, they often
plop the AF point anywhere on the critter and fire away. This often results in
eyes that aren’t in critical focus. Instead, compose your image first, then
move your AF point to the animal's eye. Focus on the eye and fire away in short
bursts (hint - you often discover that some of the frames in that burst are
just a touch sharper than others).
Tip # 4 Don't Stop During The Good Stuff!
Is there something awesome happening in your viewfinder? Then
don't stop shooting!
I can't tell you the number of times I see people only take a
fraction of the action when it lasts for more than a couple seconds or so. If
the camera is willing to keep shooting during prolonged action sequences, then
don't let up – you never know what you'll get. I've shot upwards of 150 images
without coming up for air during prolonged action sequences and am ALWAYS happy
I did! The image below was #80 during a long 12 FPS burst while this
little cub bounced all around its mom.
Sure, you may feel like you're shooting an excessive number of
frames (and the quizzical looks from nearby spectators may seem to re-enforce
this), but pixels are free and your shutter doesn't need a coffee break. Keep
firing at great action until it's done – make your buffer beg for mercy when
needed!
(PS – This doesn't mean to go crazy every time either! Controlled
bursts are the key to successful wildlife photography – long or short.)
Tip # 5 - Shoot In Great Conditions
Wanna know one of the secrets to great wildlife photography?
An ordinary subject in extraordinary conditions and great light
will beat out an extraordinary subject in poor conditions and lousy light. And,
of course, the pinnacle is an extraordinary subject in great light and perfect
conditions!
The reason I bring this up is simple – I see so many photographers
shooting in poor light and/or poor conditions (i.e. bad background/foreground,
terrible scene, etc.) and wondering why they aren't getting better images.
The brutal truth is that the best images of ANY subject happen
when that subject is in a great location in great light. So, the advice here is
twofold:
First, favor great light. I know, it happens at the most
inconvenient times of day (I hate dragging myself out of bed too), but that
first light of morning and last light of day are where you tend to find
extraordinary images hanging around. Sure, sometimes you can't hit it perfectly
(nothing more frustrating than gorgeous light without a subject to stick in
it), but shooting within that first hour and a half after sunrise or before
sunset often works out well.
Second, favor great areas. No matter how good a subject and light,
if it's not in a great location, it's never going to be a great shot. Sure, you
may discover a handsome bear in sunset light, but if you're shooting at the
city dump, no one will beg you to hang it on their wall.
I'd rather have an ordinary subject in great light and in a great
setting than an extraordinary subject in terrible light and a rotten setting. I
can't use the latter, but I can certainly use the former.
So, there you have it. And yes, I know you have probably heard of
at least a couple of these before, but are you really applying them in the
field (be honest)? If not, practice these principals the next time you’re out.
I think you’ll enjoy the results.

Steve will be speaking on Sunday, November 24th on "Lessons from the Field: A Wildlife Photographer's Experience." He
will discuss the real-world techniques he uses
each time he’s in the field to capture his wildlife imagery. Photograph by
photograph, he will paint the picture of the scene, what drew him to it, the
challenges it presented, and how he handled them. He’ll not only discuss the
artistic elements, but he’ll also break down the complex technical aspects of
wildlife photography and make them easy to understand. Steve will also cover
the keys to tackling difficult situations and how you can leverage those
challenges to your advantage to create unique and compelling
photographs.
Steve is an award-winning photographer. His images embrace the natural world and its occupants with stunning visual results. He divides his time between creating images, leading photo workshops, making You-Tube videos, and sharing his knowledge in his daily blog with how-to and practical tips. He was the recent recipient of a special recognition award for his creative accomplishments and his dedication to the art of photography.
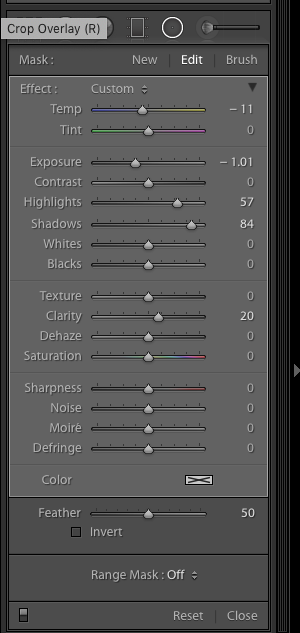
 The
adjustment tools in Lightroom (Grad Filter, Radial Filter, and the Adjustment
Brush) are useful in finishing your image. They can be used to help guide the
eye through the image. We already know that light areas attract attention and
bring them more to the forefront of the image, while dark areas recede. Plus
bright warm colors tend to attract more attention.
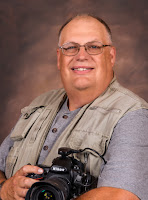
 Jeffrey
Klug has been a professional photographer for 38 years. He went to Milwaukee
Area Technical College where he earned an Associate degree in Photography and
Photo Electronics Technology. He is an award-winning photographer through many
International Exhibitions (see http://www.jrklug.com/awards/ for a look at his
award photos).


