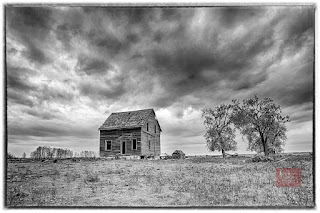
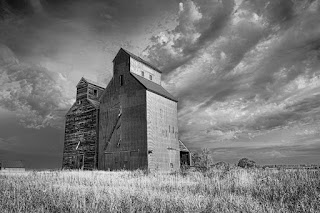
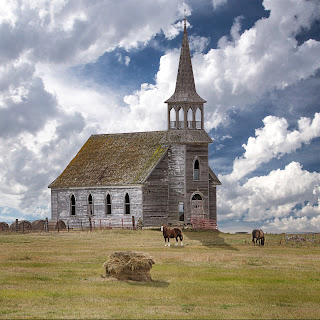
I never realized how many individuals are so elated with the
opportunity to photograph ruins. You
know those empty or abandoned buildings in the rural areas of America or the
big old empty warehouses that have become the heart of urban exploration
(Urbex) However, once I started shooting a few of these I was hooked too. Some photographers find their rewarded from
the hunt, others love speculating what took place in a particular structure.
Others just want to create some great images.
Regardless of the reason, photographing abandon buildings or ruins can
be very rewarding and a nice addition to your portfolio.

The process of walking away with a great image should start
long before the first photograph is even taken. Surveying the site, finding out
when the best light will be, knowing what obstacles are or may be in the way
are all critical to the success. Thankfully the tools available to us today
allow us to accomplish a lot of this process from the comfort of our own
computer desk. Sure many shots start as a drive by, being in the right spot at
nearly the right time.
Been there and
done that. However I actually created a notebook of those locations so I can go
back with optimum lighting or weather to really capture a nice shot.
If you have the luxury of time, you can really plan out a
rural shoot by first spending the time finding the right locations and then
using one of many Apps do a little planning for sun angle moon rise, or of
natural phenomena that will enhance, or build up your find.

Once you find your location and figure out the best time of
the day or month or year to shoot then you need to look at your equipment. What
tools do you have to maximize your location.
Do you need extra lighting, or a tripod, or what lenses at a minimum vs.
what lenses would be nice to have.
A presentation like this would have to cover safety for
sure. So many “traps” lie in wait in abandoned buildings. The last thing you
need is an injury and not being able to communicate your need for help.
Boots or shoes that can withstand stepping on a rusty nail,
or over broken glass is a very smart first step in planning. Having a first aid kit in your vehicle that
has more than just band-aids. Wearing
other protective clothing to guard against cuts or scrapes. If you’re alone,
(not recommended) make sure someone knows where you are and when you plan on
leaving so if the time passes when you planned on leaving and they haven’t
heard from you they check in and make sure you haven’t fallen through a floor.
In Stephen Covey’s “7 habits of highly successful people” He
mentions one habit “begin with the end in mind”. This presentation will be
about finding, planning, composing, and shooting abandoned buildings, then how
to get through the post processing to bring the dramatic looks out of these
images using mostly Lightroom with some help from Silver Efex Pro and a little Photoshop.
In the past 3-4 years I have had the opportunity to
photograph well over 300 abandoned structures.

I have been in structures from many different locations but
the three main areas I’ve visited are the local area in and around Chicagoland,
the old forests of Southern IL and the prairie ruins of North Dakota.
When I see a structure, in almost every case,
I see it in it’s final post produced look. In other words, I already know
before I take my first image if I am going to convert it to BW or leave it
color. I know if the sky will be super dramatic or so/so.
Sure I reserve the right to change my mind
later but I already have 90% of the “vision” of what I think this image will
look like when I’m done.
Then as I start
capturing the shots they are falling into my vision either by the way I line it
up or which direction I shoot it from, or what may or may not be in the
surroundings.
If it is a very powerful
subject, and in most cases you’ll know that as you approach it, then I will
also do a full work up of shots on the building as if I were capturing it for a
realtor. All angles, all sides, details from far and near. Because then later
on when you are in post as the inspiration hits you’ll have more to work
with.
So then the question comes up “why
don’t you shoot all of the sites like that?”
The short answer is usually time.
Many times this occurs during a photo workshop and we have multiple
sites to capture.
The clock is ticking
and guests want a balance between quality and quantity.
In those rare moments if I’m scouting alone,
or with another safety partner, then I can spend a great deal of time capturing
components of the site that do not fall into my original “end in sight”
image.
If for no other reason I’ll do it
for the practice.

Lastly we are going to go over some post processing tools.
Post is where “the end in mind” takes its final shape. The drama, or the warmth, or what ever was my
vision gets it’s foundation from the original photograph however it’s the fine
tuning and cropping in post that brings the final vision to life.
Lightroom and Silver Efex are my most used. I do also spend
time in Photoshop. Silver Efex is an
awesome tool for BW art. Being able to
fine tune and effectively burn and dodge electronically adjusting like I used
to in the darkroom is probably why I like it so much. But regardless of the tool, knowing where to
burn and how much. Be it in the sky, or in the shadows of the structure. It’s a
very useful technique for finalizing a photo. If I’m staying in color, then Lightroom gets
most of the load. I’ll take you through
a step-by-step process of the tools I use and what effect I’m looking for.
As the tools keep evolving so does the process. Even just 2
years ago I did things differently, so I can only assume the same will hold for
the future. But some of the mental tools
and step by step organization hasn’t changed much if at all. So lay out what works good for you, develop
your own style and start finding art in the old, decaying, and dilapidated
ruins.
 Keith French has been a full-time professional photographer since 2001 with an extensive background in several types of photography dating back to 1984. His years as an owner of a full-service retail camera store, Photo/Video studio, and commercial color and B & W photo lab, gave him a unique look into the full circle of the photographic industry. Buying and selling equipment and accessories, hosting and teaching photography classes and workshops, shooting and printing, combined with his time as a United States Marine Corps Aviator and the travels that were associated there, Keith has a well-rounded repertoire of photographic experience on 4 continents and 3 oceans. With these photographic experiences and his enjoyment of teaching and being around people passionate for the art of photography, Keith brings a unique combination of fun and knowledge to his workshops and classes. Having had the opportunity to teach hundreds of photographers from novices to advanced amateurs the ins and outs of picture making, you’ll enjoy spending time learning with Keith French.
You can check out his work at: https://kfrenchphoto.com/


